Sunday, November 4, 2012

Bombay Sandwich - Delhi Style

Best Blogger Tips
3 Years of my college life were the best years of my life till date. The fact that they were spent in Bombay (I still refuse to call it Mumbai), makes me in love with the city. I still cannot figure out as to whether those years were a blast because of Bombay or did I fall in love with Bombay because of my college life. Since then, everything Bombay and I feel an instant connection. Take the Bombay sandwich for example. I never had the Bombay Sandwich while I was in the city. It was mostly about Vada Pav those days, or sitting in the Irani Restaurant behind college every evening and having Bun Maska and cutting chai. Bombay Sandwich came much later...3 years after Bombay to be precise, when I was posted in Vadodara. There was this vendor just outside the Hotel where I used to work who prepared this and it was the ideal snack, especially since I was bored out of my skull having restaurant food daily. Since then, I have been in love with Bombay Sandwich and during my trips back to Bombay have tried it out on a few occasions. So, last week during my Old Delhi trip to eat some yum food, I chanced upon this vendor selling Bombay Sandwich and I had to try it out. After all, this was my way of still maintaining my connect with the maximum city.
Now the Bombay Sandwich made in Old Delhi was totally different from the ones available in Bombay. The beetroot slices did not find their way into the sandwich and grated cheese was replaced by good old paneer (Cottage cheese). In the end, he did not toast the sandwich (which I pointed out to him) and my favorite was missing, which being the accompaniment - like sprinkled sev on top or some potato wafers or best even more grated cheese on top.
So have a look at this variation available in the bylanes of Old Delhi and till I post about the Real McCoy in Bombay, this will have to do till then.
Take 2 slices of bread and smear butter on one end of each slice. Then apply some mint chutney.

Layer one bread with sliced boiled potatoes.

Now add a layer of sliced cucumber

Sprinkle some sandwich masala. Most call this their secret to a great sandwich. I just think this is chaat masala and  black pepper.

Add in some onion rings. 

Followed by slices of tomatoes. Now this is when Beetroot slices should follow also, but this is Delhi style..need to be hatke.

And it totally deviates from here and starts looking like a Delhi Sandwich. Add in a slice of paneer (I still love my grated cheese on top). Sprinkle some more secret masala.

Cover with the second slice. The sandwich is almost done.

Purists...dont cringe. I know he should toast it to get the real Bombay style sandwich, but like I said earlier, this is a distant copy. He just cuts it in 4 triangles to make them bite sized.

A sachet of ketchup (now I love the toppings I got in Bombay) and you are ready to bite into it.

Saturday, November 3, 2012

Old Delhi Food Trail - A Photo Essay (Part I)

Best Blogger Tips
Every once in a while I have this urge to try the real street food of Delhi and that is when I make my trip to Chandni Chowk. Over my last few trips, many of my friends have joined me to walk through the always crowded by lanes of Chandni Chowk, Chawri bazaar and nearby areas to savor some of the tastiest food available. The choices on display blow your mind and it is impossible to miss the food stalls and little shops as they cater to a thronging crowd of hungry visitors daily.
These are some of the images that I captured in between digging into tasty chaat and searching for some legendary food outlets.

Chandni Chowk - the mere mention brings up memories of some tasty chaat vendors and the best chaat in Delhi.

Bishan Swaroop

Sultan Kulle Wala


Ashok Chat Corner

Not just chaat, the area is brimming with snacks and food from everywhere.
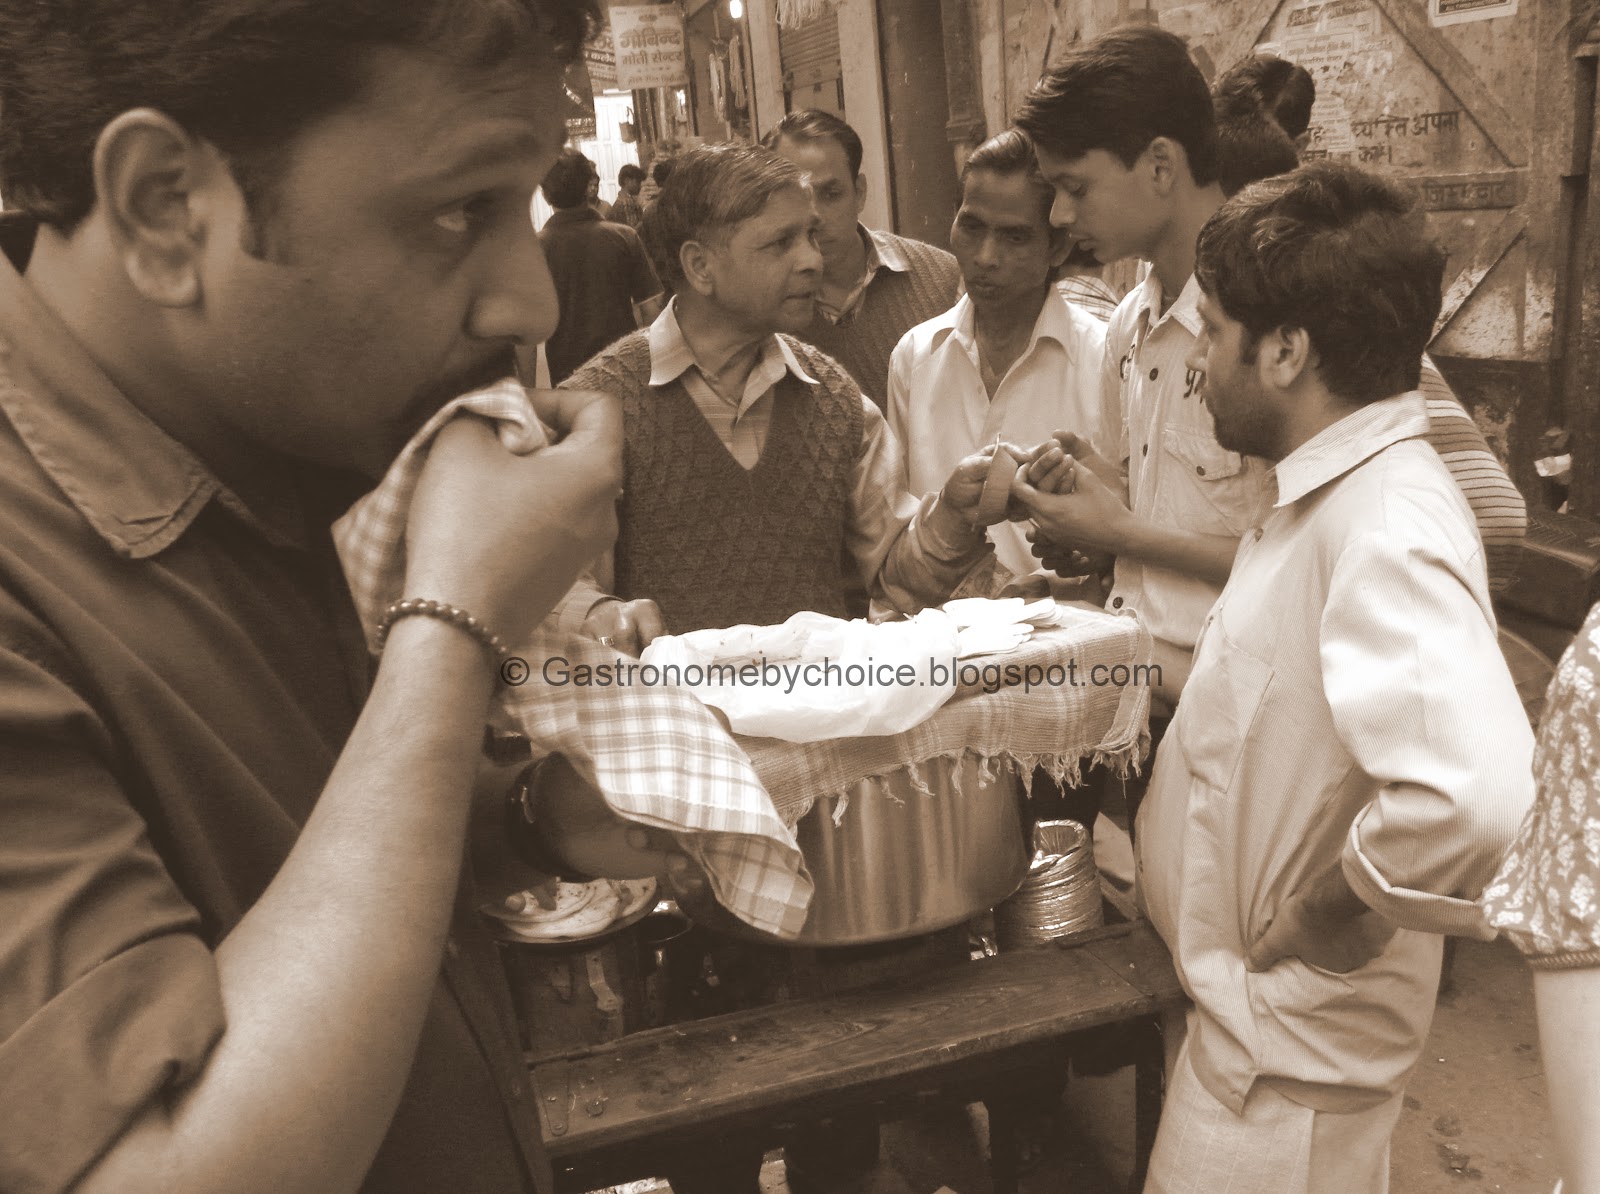
Bombay Sandwich in Delhi


Panna standing at Nai Sarak has some tasty Moth Kachori..try it if you havent till now.
Incase regular kachoris are what you crave then make way to Jung Bahadurs Kachori shop

And how can you be in Delhi and not try Matra Kulcha. 
And talking of Matra, Rameshji in Kinari Bazaar serves the best Matra Kulcha in town.

A trip to Chandni Chowk will be incomplete without a mention of Parathewalli Galli. The atmosphere and the crowd eating there at any time is to be seen even if oily fried parathas are not your choice of food.


And it is impossible to roam the area and not catch the countless hawkers selling nankhatai.


Going to the old Delhi area and not making a trip to Karim's is totally unpardonable, unless you are a vegetarian. Famed for its mutton preparations, the lamb Nihari and tandoori roti for breakfast are a must do, though they even serve it in evenings for a few hours.
M in front of Karims entrance - should I order the Nihari, Paya, Qorma or all three ?

The Tandoori Roti and Nihari are a perfect couple :). Try it at Karims or Al-Jawahar. Which one is better? Well, the jury has been undecided for all these years.


This happens to be the breakfast crowd at Shyam Sweets. Try out their Bedmi Pooris.

 Enough of oily and calorie filled food...try the fresh fruit instead.

There is also a lot to satisfy your sweet tooth

Rabarhi


And how can one forget Daulat ki Chaat. Only available for a few months of winter, I cant wait for it this year. Another few weeks to go I guess.

And the Khurchan at Hazarilal Jain...yum!


And the best way to finish off everything you ate is by way of a thick lassi at Amritsari Lassiwaale near Fatehpuri gate.

Thursday, October 18, 2012

Caramel Sauce

Best Blogger Tips
Oodles of caramel sauce drizzled over ice cream scoops or say cakes can make anybody's mouth water and crave for something sweet. Talk about making your own caramel sauce and a lot of people develop jitters considering it to be tedious, risky and working with thermometers. Well, its easy to make and only takes minutes to prepare and having a sweet, salty, buttery sauce to drizzle over your desserts is a must have in your cooking repertoire. Though it only requires minutes to prepare, those minutes are very crucial and demand your full attention while you are at it, so ensure all the ingredients are measured and within reach and anything that can take you away from the cooking range has been handled before you set out to make this sauce. The caramel sauce also stays well in  your refrigerator for upto 2 weeks, so its good to make yourself a jar that is within your reach when you are down and need a sugar kick or sweet therapy after a real hard day.
Coming to basics for this sauce, it is in simple terms a sauce made of melted sugar. Therefore it is essential to keep your focus while melting sugar. It goes from just right to a horrible mess in a matter of seconds. That is one of the reasons why I add little water to sugar. It sure makes it a little longer to melt and get the color, but makes the process a little easy to handle. A lot of people, and masters at doing this, usually prefer no addition of water (its called the dry method of making caramel sauce), but thats your call at how comfortable are you in doing this.
As I have said earlier, ensure all ingredients are close by at arms length to add into the sauce. Running around at the last minute will ensure you have a burnt sauce on your hands and some great deal of scrubbing to do on your pan.
Use a heavy bottomed pan, preferably with a light surface so that you can make out the color of the melted sugar. Also ensure the sides are a little high, as you do not want your sauce to spill onto your cooking range (more scrubbing) or on to yourself, especially when it foams.
Lastly, caramel is hot. Please ensure proper clothing and safety. Do not burn yourself while making it. There can be splashes while whisking so be careful. As it foams during addition of cream there can be some steam that will escape. Be careful.
 

Caramel Sauce

Ingredients:
Sugar, granulated - 210 gm.
Butter - 85 gm.
Sea Salt - 1 Tsp
Whipping cream - 120 ml.
Water - 1/4 Cup

Method:
1. Add the sugar along with the water to a heavy bottomed pan and heat on a moderate flame. As the sugar melts, whisk it around to ensure it browns evenly.
2. Once it is browned to an amber color (I prefer a little darker sauce, so I wait for a more dark amber), add in the butter and sea salt. Whisk well until the butter has melted.

3. Take the pan off the heat, and wait for 30 seconds. Add in the cream while whisking to incorporate the cream to the sauce. The sauce will foam up after addition of cream for a few seconds. It is normal. Continue to whisk until the sauce is smooth .

4. Allow to cool and transfer to a glass jar.
5. Store in the refrigerator and warm before serving.  

Serving Suggestions:
- Spoon it over Vanilla ice cream.
- Drizzle over brownies or chocolate cake.
- You can also dip your favorite fruit in it.
- Drizzled over pancakes
- Goes really well with Christmas pudding.
- I just eat a spoonful..it really tastes good by itself.

Monday, October 15, 2012

Banana & Raisin Pancakes

Best Blogger Tips
There is a joy in cooking for kids. And the joy infact multiplies when you have kids cook alongwith you. The sheer enthusiasm in them to help out and contribute is infectious. It can range from something as menial as getting the utensils or sifting flour, they are up and about and for me personally cooking with my two boys is the biggest stressbuster. One of these Sundays, we decided to make banana & raisin pancakes and though I knew it would be an amazing Sunday, I'm sure the thought of 3 boys in the kitchen had already made my better half dismiss this as a day off and prepare for a day spent in cleaning the mess we would create. Yes, there was a mess, but most of it was on our clothes and our faces, with some flour flying around and the different syrups and sauces they wanted to pour on their pancakes in the end and some of those sauces finding their way to their aprons. Truthfully, we love to see the look on her face after we are finished. After all these years, she still hasn't figured out that boys will be boys no matter how old they get. 

Banana Pancakes
(Makes 10 pancakes)

Ingredients:
Bananas, mashed - 2
Bananas, cut into rounds - 2
Raisins,soaked - 1/2 Cup
All-Purpose Flour - 125 gms.
Eggs - 1
Milk - 245 gms.
Sugar - 15 gms
Baking Powder - 2 Tsp.
Salt - 1/4 Tsp.
Oil - 20 gms.

Method:
1. Combine all the dry ingredients (Flour, baking powder, salt, sugar) in a bowl.
2. In a separate bowl mix all wet ingredients except the bananas that have been cut into rounds.
3. Sift the dry mixture into the banana mixture and whisk lightly to form a batter. Add in the raisins and give it a light whisk to mix evenly.
4. Heat a lightly oil pan or griddle.
5. Pour a ladle of the batter onto the pan. Allow to cook on one side and then flip them over.
6. Cook on both sides till they are golden brown.
7. Serve hot with chopped bananas, whipped cream and maple syrup. (Or a combination of sauces, like chocolate sauce and strawberry sauce).

Friday, September 21, 2012

Pesto Genovese

Best Blogger Tips
Its been a very long time since I posted on this blog and finally today I found the time to do so. I can tell you for one thing that it wasn't laziness and gastronomically speaking the time gone by has been my most active period when it comes to food and beverages. Even apart from food & beverages this has to be the most active time, period. After 16 long years in the corporate rat race, I decided to take a break and follow my dreams, mind you dreams, not just one dream and even though I thought I will take a nice month off and then get into the grind, it was not to be. Since then I have been working on various projects, two of which are starting a concept restaurant and consulting on a adventure resort for a close friend. There were several meetings with people, both for business and pleasure, and many meals in restaurants.
Infact it was on one such meeting at a friends residence that he showed me the basil that had grown on his farm and how he intended to make Pesto that day. Post making some pesto with him, I carried a pack of Basil leaves home with me to make some of my own. My better half loves Pesto and since she is extremely busy with her business, this being the peak season, this would have been a nice surprise. Though, various versions of Pesto exist, some that involve walnuts, sun dried tomatoes and believe me eggplants, the classic basil pesto has always had a special place in my heart (and stomach). A short detour to the grocery store fr some ingredients, and I was all set to make my own Pesto. 
Now there are few things that I always follow while making Pesto, and that because I'm a purist and like to do things the hard way. Believe me the result shows in the taste. For starters, I always blanch the basil leaves. Blanching the basil leaves gives the pesto a nice bright color and not too forget it reduces the natural bitterness that basil imparts to the pesto (And this is because I do not find young small basil leaves in India).Secondly, everyone that I have seen uses the food processor these days. I prefer using the good old mortar and pestle. It takes long that way, but somehow I love the pesto more. If you want more information on Pesto, its origins and variations wikipedia has a nice post on it.

Pesto Genovese

Ingredients:
Basil leaves, blanched in boiling water for 20 seconds and shocked in ice cold water - 3 Cups
Extra Virgin Olive Oil - 1/2 Cup
Parmesan, finely grated - 1/3 Cup
Pecorino, finely grated - 2 Tblsp
Pine Nuts - 1/4 Cup
Garlic, finely chopped - 2 Cloves
Sea Salt - To Taste

Method:
1. Add all the ingredients, except the seal salt and half the olive oil in the mortar and pound them to a smooth paste. Continue adding the olive oil during the pounding.
2. Season with sea salt. 


Serving suggestions - You can add it to Pasta, Minestrone, and potatoes while cooking. I love taking a nicely toasted bread slice and spreading pesto on it and adding some shredded chicken or assorted vegetables. 

 
Design by Free WordPress Themes | Bloggerized by Lasantha - Premium Blogger Themes | Laundry Detergent Coupons