Monday, October 17, 2011

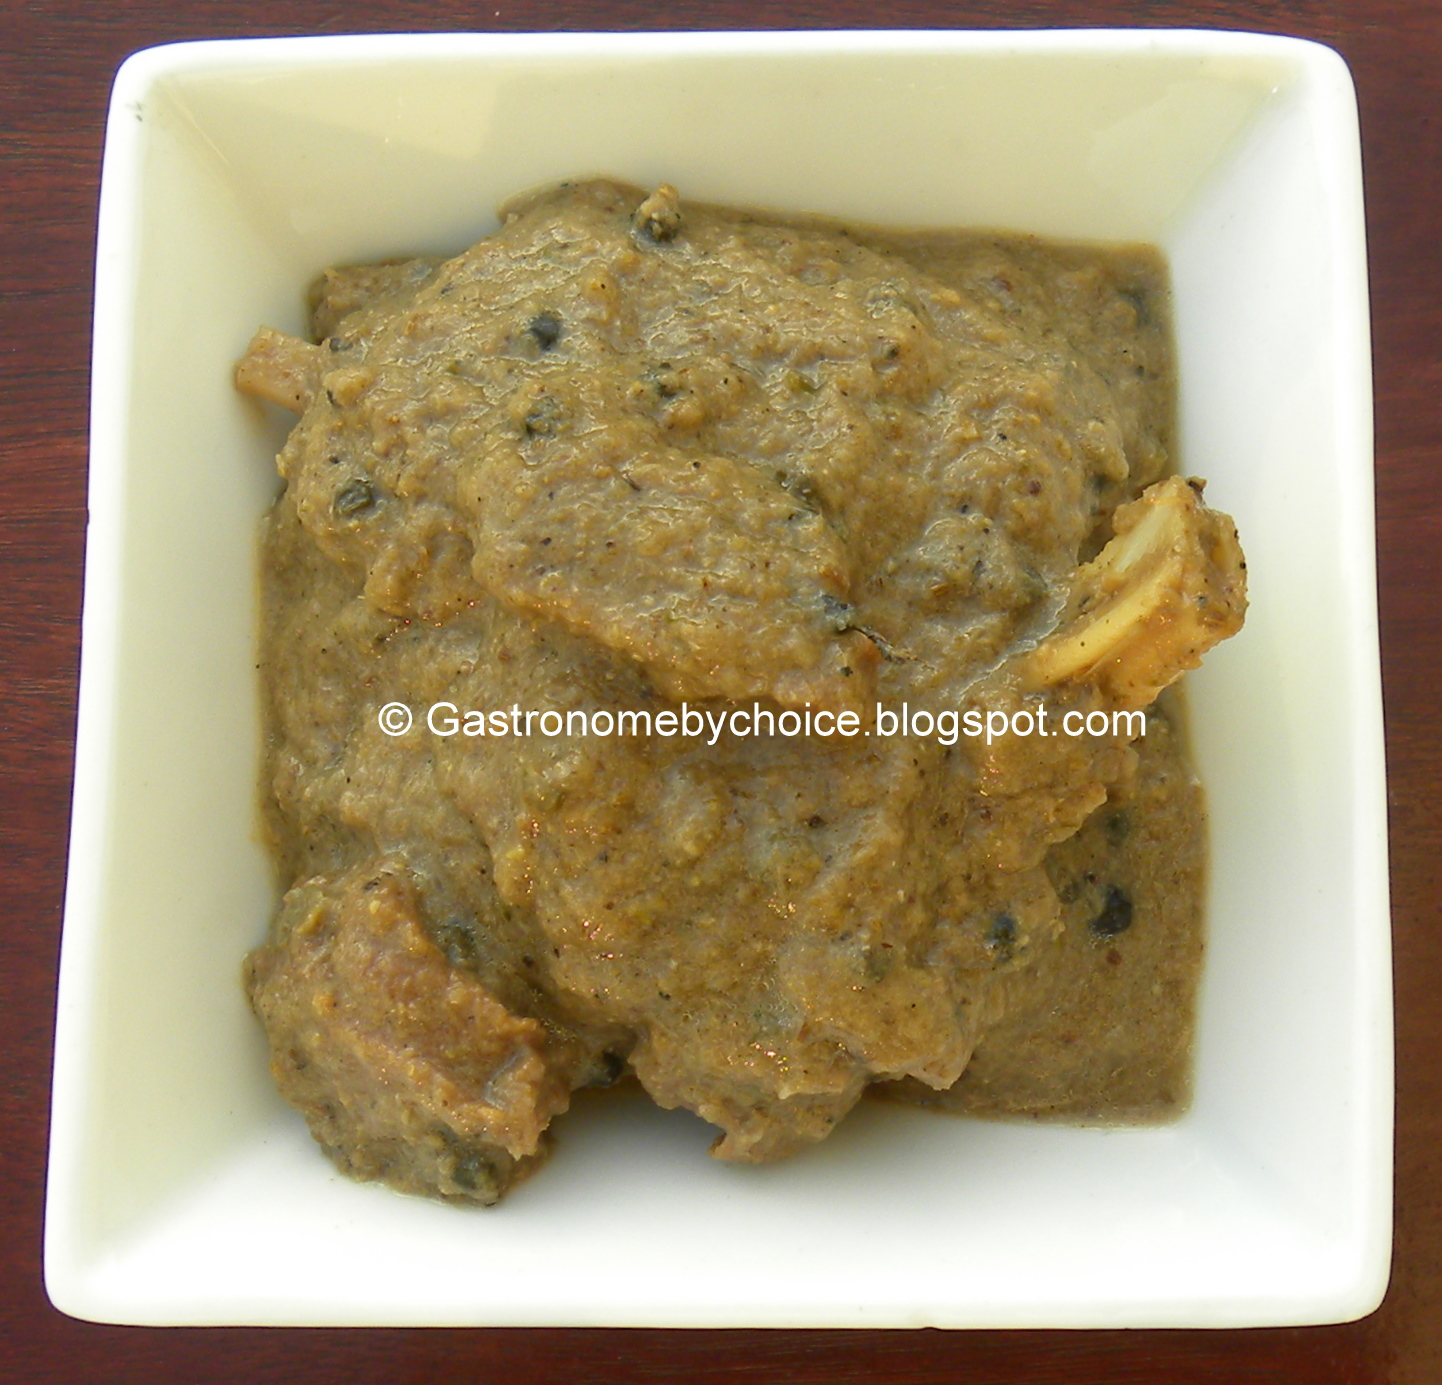
Kachi Mirch Ka Gosht

Best Blogger Tips
Gastronomically, it was a very satisfying weekend. The start could not be more interesting, with a visit to Aap Ki Khatir near Nizamuddin. I will post a short write-up on the place in a day or two. The remainder of the weekend was spent cooking up a lot of stuff and trying out new things. It all culminated last night with some close friends, a lot of good spirits and an array of food made by my better half and I. The star of the entrees was the Kachi Mirch Ka Gosht and though I did not get to taste it last night, a nice heapful on top of some pulao was heaven this morning.
The recipe has been adapted from Prashad - Cooking with Indian Masters, a gem of a book by Jiggs Kalra, showcasing brilliant recipes from the Masterchefs. I have had my copy for over 17 years now (I bought this in my 1st year college) and I keep going back to it, sometimes for recipes, and, sometimes just to browse through the book and bring back great memories from my kitchen days. I have worked with some of the chefs featured in the book, mostly as a trainee or as a colleague and I love the way the book breaks down each recipe and explains how to go about it.

Kachi Mirch Ka Gosht

Ingredients:

Lamb, assorted cuts - 1 Kg
Yogurt - 1 Cup
Coriander Seeds - 4 Tsp
Cumin Seeds - 1 Tblsp
Black Cumin Seeds (Shahi Jeera) - 1.5 Tsp
Black Peppercorn - 1.5 Tsp
Whole Garam Masala (5 Green Cardamom, 1 Black Cardamom, 1 Cinnamon Stick, 4 Cloves, 1 Bay Leaf)
Onion Sliced - 250 gms
Ginger,chopped - 2 Tblsp
Green Chillies, deseeded and chopped - 4
Green Peppercorn -1 Tblsp (10 gm)
Cream 3/4 Cup
Fennel Powder - 1 Tsp
Ghee - 3/4 Cup
Salt - To Taste

Method:
1. Pound Coriander seeds, cumin seeds, black cumin and black peppercorn. Mix in Yogurt along with salt. Whisk well.
2. Marinate lamb cubes in this yogurt marinade for an hour.
3. Heat ghee in a large vessel. Add in the whole garam masala and saute till it begins to crackle.
4. Add in the sliced onions and fry till it starts to turn golden brown.
5. Add in the ginger,green chilies and fry for a minute.
6. Take off flame and allow to cool. Once cooled process in a blender. Put the processed mixture back on flame.
7. Add in green peppercorns and cook for a couple of minutes.
8. Add in the lamb pieces along with the marinade. Stir for 30 seconds.
9. Add in 3 cups of water. Bring to a boil. Simmer till lamb is tender.
10. Add in the cream and bring to a boil. Add in the salt and mix well.
11. Sprinkle fennel powder before finishing.
12. Serve hot with roti or pulao.

Sunday, October 9, 2011

Korma Ki Biryani

Best Blogger Tips
It has been a really long and busy weekend. Actually the weekend started on Thursday itself, with everyone celebrating Dussehra, the festival celebrating the Indian god Rama's victory over the evil demon king Ravan. The festival is celebrated with large effigies (some of them as huge as 70 ft high) of Ravan, his brother Kumbhakarna and his son Meghnaad, set afire. The festival is also called Vijaydashami and is on the 10th day of Navratri. In the eastern part of India, this day is also celebrated as the day Goddess Durga killed the buffalo demon Mahishasura. In short, the day is celebrated as the day of victory of good over evil. Starting the Navratris the festival season has started in Delhi and many parts of India and will continue till Diwali and then all the way till X'Mas and New Years eve. The weather has also turned much cooler, so there will be a lot of parties and a lot of good food being cooked.
After the hectic Navratras and Dussehra, we decided to take it easy this weekend, as far as cooking at home was concerned. We anyways had the F1 Grand Prix Food Festival to attend at Leela's in Gurgaon and I was saving myself up for a grand evening and I can say now after having been there last night, that it did not disappoint. Taking it easy meant a Biryani lunch. Now Biryani, atleast in our household is the relaxation day food. It is meant for days when you want to laze around in front of the TV, watch a movie, eat food and drink beer. Since I had picked up atleast a dozen movie titles from a sale a few days back, the agenda was to start watching the movies, and enjoy some tasty Biryani alongside chilled Beer (raita, papad thrown in too). 
The Biryani that I decided to cook up this time was a Korma Biryani. Korma and Biryani, both, are extremely popular food items and when we marry the two we get an absolutely brilliant, tasty dish.
Other Biryani recipes on this site:
Bohri Biryani
Lucknowi Dum Pukht Biryani
Khoja Kachi Biryani
Hyderabadi Biryani


Korma Ki Biryani


Ingredients:
For the Korma
Mutton / Lamb, assorted cuts - 500 gm
Potatoes, medium sized, quartered - 2
Onions, finely sliced - 2
Caraway Seeds - 1/4 Tsp
Green Cardamoms - 2
1" Cinnamon Stick - 1
Ginger Paste - 1 Tsp
Garlic Paste - 1 Tsp
Turmeric Powder - 1/3 Tsp
Red Chili Powder - 1 Tsp
Yogurt, whisked - 1 Cup
Muskmelon Seeds - 2 Tsp
Watermelon seeds - 2 Tsp
Cashews - 6
Dessicated Coconut - 2 Tsp
Coriander, chopped - 1 Tsp
Mint Leaves. chopped - 1 Tsp
Green Chilies, chopped - 2
Salt
Oil - For frying

For the Rice:
Basmati Rice - 250 gm
Peppercorns - 5
1" Cinnamon Stick - 1
Cloves - 2
Salt
Oil - 1 Tblsp

For Assembling
Milk - 1/3 Cup
Lemon Juice - 2 Tsp
Ghee - 1 Tblsp
Cream - 1 Tblsp
Saffron, crushed & dissolved in half cup warm milk - 1/2 Tsp
Wheat flour (Atta) - Made into dough with water for sealing the pot
Coriander, chopped - 1 Tsp

Method:
For Korma
1. Make a paste of musk melon seeds, watermelon seeds, cashews and dessicated coconut with 1 Tblsp water. Keep aside.
2. Heat Oil in a handi. Fry the potatoes till they turn golden brown. Drain and keep aside.
3. In the same oil, fry the onion slices till they turn golden brown. Remove and keep aside. Once cool, crush the onion slices.
4. Now take, a large pot (preferably a lagan) which can accommodate both meat and rice. Transfer half the oil from the handi to this pot/lagan. Put it on flame.
5. Once the oil is hot, add caraway seeds, cinnamon stick and cardamoms. As the cardamom starts to change colour, add the ginger and garlic paste. Fry for half a minute and add in the salt, turmeric powder and red chili powder (mix red chili powder with a tsp of water to make a paste and add - this will prevent the spice from burning).
6. Add in the meat pieces and fry on high flame for 5 minutes. Lower the fame and add in the yogurt and continue stirring till it comes to a boil.
7. Add in the melon seeds, cashew, coconut paste. Mix well and cook for a minute.
8. Add a cup of water and cover and cook on a medium flame for 20 minutes or till meat is 3/4th done.
9. Add in the fried potatoes and crushed onions. Mix well and cook till potatoes are tender and the meat is done.
10. Add in the chopped coriander, green chilies and mint. Mix well.
11. Cook till meat gravy is reduced to one cup.
For the Rice:
12. Soak the rice for 20 minutes. Drain.
13. In a large vessel (separate from the one used to cook the meat) boil a litre of water along with peppercorns, cinnamon, cloves, salt and oil.
14. When water comes to a boil, add in the rice.
15. Cook till rice is 2/3rd done. Drain the water.
To Assemble:
16. Layer the rice over the Korma (Meat gravy).
17. Sprinkle the ghee, cream, lemon juice, saffron soaked in milk and milk on top.
18. Cover with a tight fitting lid and seal the sides with atta dough.
19. Put a tava (Flat plate) on flame and add the Biryani vessel on top. Cook for 10-15 minutes on medium flame.
20. Remove from flame, open pot and garnish with freshly chopped coriander.Serve hot.

Monday, October 3, 2011

Sooji Ka Halwa (Semolina Sweet Dessert)

Best Blogger Tips
Today happens to be Maha Ashtami (the eighth day of the Navratri festival) and it is fairly common in the Northern Part of India for households to celebrate Ashtami by doing the Kanjak Ashtami Pooja. Since these nine days of the festival are dedicated to the Hindu goddesses, on Ashtami people break their fast by calling young girls home and treating them as goddesses. These "Kanjak Devis" are called home, their feet are washed and they are offered the ceremonial food, which consists if puri (fried bread), chana (gram) and halwa. Apart from this they are also offered bangles, red chunni and some token amount known as a shagun.
Halwa means a dense sweet preparation and derives its name from the Arabic word Al Halwa meaning "Sweet Confection". Though there are numerous kinds of Halwa, made with different exotic ingredients, the ones made with Sooji (Semolina), Carrot (Gajar), Almond & Moon Dal (Mung Bean) are most common and popular. You also find a pistachio based halwa commonly in India, but people are unware that it is a kind of Halwa. It is called Soan Papdi in most places and its more denser preparation is called Patissa. In fact, if you have anyone going towards Doda in J&K, you should request them to get you some Patissa from a place called Kud. It is like nothing you ever tasted before. Similarly, if you manage to go down South of India or have some one going, Tirunelveli in Tamil Nadu is a place to visit. Called the Halwa City, it is famous for it's sweet wheat based halwa.
 

Sooji ka Halwa


Ingredients:
Semolina - 3/4 Cup
Sugar - 3/4 Cup
Ghee (Clarified Butter) - 6 Tblsp
Water - 1.5 Cups (Most suggest using Milk, but I prefer using water)
Almonds - 1/4 Cup
Cashews - 1/2 Cup
Raisins - 1/2 Cup
Pistachios- 1/4 Cup
Green Cardamom Powder - 2 Tsp

Method:
1. In a small sauce pan, combine water and sugar to make a light syrup. Keep aside.
2. Also, chop the nuts, keeping some aside for garnish. Fry the nuts in 1 Tblsp ghee. Keep aside.
3. Heat 4 Tblsp of ghee in a wok.
Add the semolina and mix well.
Roast the semolina while stirring consistently (to prevent sticking) till it attains a light biscuit color.
4. Add in the fried nuts and mix well.
5. Add the sugar syrup to the sooji (Semolina) and mix well.
Keep stirring and cooking till most of the water has been absorbed and the mixture has achieved a wet pasty form.
6. Add in the remaining 1 Tblsp of ghee. Mix well and take off flame.
7. Garnish with fried nuts.

Boiled Onion Paste

Best Blogger Tips
Just a few posts ago, I had written on lengths about the cuts of the onions and how it influences the dish. That post was about fried onion paste, this time we talk about boiled onion paste. 
The recipe for this paste is straight out of a Jiggs Kalra book (all of his books, have the same recipe). Incase you love Indian cuisine, you have to possess a Jiggs Kalra book, atleast one if not all.
Now various authors talk about additions of various spices to this paste, but having tried out addition of cloves, black peppercorns, cinnamon etc., I go with Bay leaves and Black Cardamom as they pep up the flavors without overpowering the paste.

Boiled Onion Paste

Ingredients:
Onions, peeled, washed & roughly cut - 1 Kg
Bay Leaves - 3
Black Cardamom - 3

Method:
1. Add all ingredients in a handi alongwith 200 ml + 4 tsp water. (The onion to water ratio has to be 5:1)

2. Bring this to a boil and simmer till until then onions are transparent and the water has more or less evaporated.
3. Cool this mixture and transfer to blender. Make a puree.

Saturday, October 1, 2011

Bharwaan Aloo in Tarbuj Ki Karri ( Stuffed Potatoes in Rajasthani Watermelon curry)

Best Blogger Tips
I have been contemplating a fruit based curry for over 2 years. The reason behind this has been a chicken in watermelon curry recipe that I found on a food magazine. I had tried that out and did not really like the way it turned out. So my joy knew no boundaries when I stumbled upon this watermelon curry recipe on the Saveur site. It was a traditional Rajasthani dish made with pieces of watermelon (both the red flesh and the outer white flesh) and the final dish was like a watermelon pieces in a thin curry dish. It's really so amazing, getting exposed to your country's culinary gems by someone in a different continent. The writers in Saveur based their recipe on one that appeared in 660 Curries by Raghavan Iyer (Workman, 2008).
My take below was a little different. I turned this into a curry sauce in which I added some stuffed potatoes. Since, it was a very last minute decision to cook this one, the justice done to the stuffed potatoes was not as much as should have been, since I wanted to plate it up before the sun went down. The gravy on the other hand was a different story altogether. It tasted yum! and my better half and I are in total agreement that this is now part of our collection of dishes for the special occasions. I'm tempted to replace the stuffed potatoes with some fish, but for that to happen, we will need to wait till the Navratras (Traditional Hindu festival of 9 days of worship - No meat or egg) get over.
Incase you still want to cook it the traditional way (no stuffed potatoes), then click here for the original.
While you are at it and if you love stuffed potatoes, also check out Bharwan Aloo Churneywaale (Stuffed Potatoes in a chutney gravy) posted a few years earlier on this blog.


Bharwaan Aloo in Tarbuj Ki Karri (Stuffed Potatoes in Watermelon Curry)
(4 Portions)

Ingredients

For the Stuffed Potatoes (Bharwaan Aloo)
Potatoes, Medium, Peeled and cut into barrel shapes - 750 gm (Around 4-5 big potatoes)
Paneer, shredded - 120 gm
Green Chilies, minced finely - 4
Ginger, grated - 1 Tsp
Cashewnuts, crushed - 7
Cheese, grated - 3 Tblsp
Pomegranate Seeds - 1/2 Cup
Salt - To Taste
Oil - For frying

For the Watermelon Curry (Tarbuj Ki Karri)
Watermelon, medium sized - 1
Ajwain (Carum Seeds)- 1/2 Tsp
Cumin seeds (Zeera, whole)- 1/2 Tsp
Nigella seeds (black onion seeds) (Kalonji) - 1/2 Tsp
Dried Red chillies, stemmed - 2
Garlic, finely chopped - 4 Cloves
Turmeric powder (Haldi) - 1/4 Tsp
Oil - 2 Tblsp
Salt - To Taste


2 tsp. chopped fresh coriander, to garnish

Method:
Bharwaan Aloo
1.
Heat Oil in a Kadhai (wok). Deep fry potatoes till three-fourths done.
2. Remove and cool the potatoes. Scoop out the centre leaving around 1/4' from the sides.
3.Keep Aside.
4. Now prepare the filling by mixing the grated paneer, finely chopped green chillies, grated ginger and crushed cashews & raisins. You can also add in some of the scooped potato after frying it a little & mashing it.
5. Stuff this filling in the potatoes.

Tarbuj Ki Karri
5. Trim and discard the green skin of the watermelon, leaving the inner, whitish flesh intact. Separate the white flesh from the red flesh with the knife, discard the seeds and cut both white & red flesh into 1-1.5" pieces. Set aside.
6. In a handi, heat oil over medium heat. Add ajwain, cumin, kalonji and dried red chillies and cook, until cumin starts to turn color (around 2 minutes).
7. Add chopped garlic and cook, until golden brown (around 30 seconds).
8. Add watermelon white flesh, salt, and turmeric and mix well. Cook until the white pieces turn color to light brown and all liquid evaporates. Stir occasionally.
9. Pour a cup of water into the handi, cover the pan, and simmer the curry over medium heat. Cook for around 10 minutes or till the white flesh pieces are tender.
10. Uncover the handi, add the red flesh pieces and any juice that you might have collected. Mix well.
11. Raise the heat to medium-high and bring to boil, stirring occasionally for around 5 minutes, until the flesh softens slightly.
12. Switch off the flame and cool the curry.
13. After the curry has cooled down, process it in a blender.
14. Pass through a strainer into the handi.

Bringing it Together
15. Put the pureed curry back on flame and add in the potatoes.
16. Simmer till potatoes are done.
17. Check for seasoning.
18. Transfer curry to a serving bowl. Halve the stuffed potatoes and place with stuffed side up. Garnish with chopped Coriander.
19. Serve hot.

Monday, September 26, 2011

Street Foods of India - Kulle Ki Chaat (Delhi)

Best Blogger Tips
The charm of being a true blue Delhi resident is the exposure one has to chaat ...different kinds of chaat. Chaat derives its name from the hindi word 'Chaatna', literally meaning licking ones fingers. Since most of the chaat items ensure you will end up licking your fingers, the name is very apt. Chaat has now spread its tentacles to various parts othe country and it is not uncommon to find chaat stalls in South India, where they hawk something called a Delhi Chaat. The key differentiators of all chaats boils down to the use of ingredients and their freshness. The freshness of yogurt used, the freshness of the spices, the crispness of the papdi, the freshness of the fruit ...the freshness.
I was in Old Delhi last to last Saturday to sample the chaat fare on offer and try out the kulle ki chaat which sadly is not commonly available, atleast, not in the area I'm in. I love my chaats and my better half more than me, but we had both never had a kulle ki chaat ever. So it was a pleasant experience and the glee on both our faces while we were sampling this was a moment to freeze.
Post my return back home, I knew this was one chaat I had to do for this blog. More than that, this was one for keeps as a great appetizer for parties. It's simple, fresh and so different. The first challenge was to source the variety of bengal gram used in the chaat. Since, it is not used in the chaats in my area, I had to request someone to get it from me from Khari Baoli. Next was the conceptualization. For kulle ki chaat, you need to make a kulla out of Potatoes, cucumber, chunk of watermelon, bananas,tomatoes and then fill them and spice them. Kulla is a scooped out vegetable or fruit. I used only three, Watermelon, Potato and Cucumber, despite protests from my better half to use bananas as she loved the banana ka kulla. The result was the same expression on both our face as we had our plate of watermelon, potato and cucumber ka kulla and enjoyed a wonderful Noida sunset from our rooftop.

Kulle Ki Chaat
(For 4 People)


Ingredients
Potatoes,big - 2
Watermelon, seedless (I didn't get one) - 1
Cucumber - 2
Cumin - 3 Tblsp
Black Salt - 2 Tblsp
Salt - To Taste
Lemon - 2
Bengal Gram, the zero size variety (soaked overnight and boiled) - 1/2 Cup
Pomegranate seeds - 1 Cup

For the Masala (alternately, use 3 Tblsp chaat masala)
Black Pepper Corns - 2 Tsp
Cloves - 4
Cinnamon Stick - 1
Mango Powder - 3 Tsp
Ginger Powder - 1 Tsp
Ajwain - 1/2 Tsp
Dry Mint Leaves - 1/2 Tsp

Method:
1. Parboil the potatoes and peel and cut them into half (breadthwise). Scoop out the middle to make a empty barrel.
2. Peel the cucumber and cut into 4 inch pieces. Hollow them out too.
3. Take a small chunk of watermelon and hollow it out.
4. Arrange them on a plate.
5. Dry roast the ingredients for the masala and powder them.
6. Dry roast the cumin seeds and powder them with a mortar and pestle.
7. Sprinkle half the salt, black salt, cumin powder, chaat masala on the hollowed cups.
8. Add the pomegranate and bengal grams and fill the cups till they are half full.
9. Sprinkle the rest of the salt, black salt, cumin powder, chaat masala.
10. Squeeze lemon juice on the cups.
11. The chaat is ready to go.

Sunday, September 25, 2011

Fried Onion Paste

Best Blogger Tips
A lot of times, people find themselves stuck when it comes to adding specific pastes to Indian pastes, one of them being onion pastes. Just like a recipe calls for onions cut a specific way, so do some recipes when they call for a boiled onion paste or a brown onion paste (also called a Fried Onion Paste). The cut of the onion and the paste does make a difference to the dish, a very subtle difference but a difference surely.
This was a very important lesson that I received way back in 1997 while cooking in the management training kitchen at WMI (Welcomgroup Management Institute). Till then, I used to cut the onions any which way I felt like and mostly used onion pastes as I liked my gravies smoother. Else, sliced were much preferred, unless you were in the mood to finely chop the onions (believe me, when you have been chopping 20 odd kgs of onions everyday for a month, mood does come into play, when you have some leeway, like we had in the MT kitchen). Chef Manjeet Gill was visiting the WMI facility and dropped by the kitchen to see what my 3 other colleagues and I were upto. On seeing me slice onions for a specific dish, he walked me up to ask me what I will use it for. The dish in question called for chopped onions, and he promptly pointed it out and told me to correct it. I asked him as to what difference it will make to the dish and his reply was "plenty" atleast to the taste(summing it up. Can't remember the exact words).
Due to the huge respect for the man (his works are legendary and he's a fantastic man. Just met him a year back and I just go starry eyed meeting him), I promptly corrected the technique. But in a day or two, I tried the experiment of cooking up a dish three times, using chopped onions, sliced onions and fried onion paste. The difference was there ...the difference that makes one dish good and the other great.

Fried Onion Paste

Ingredients:
Onions - 1 Kg.
Yogurt- 100 gm.
Oil - For frying

Method:
1. Slice the onions.
2. Heat oil in a wok and saute onions till they are golden brown.
3. Remove onions on an absorbent paper to drain excess oil.
4. After they have cooled down, blend them in a processor with yogurt to a fine paste consistency.
5. Your fried onion paste is ready to use or store. (can be stored in an air tight container for 10-15 days).

Thursday, September 22, 2011

Chocolate Nankhatai

Best Blogger Tips
It was a busy last weekend. After weeks of delay due to rains, and laziness, I finally managed to get to the Walled City (Chandni Chowk and around) to sample the foodie fare available. And I did it 2 days in a row. With 65 places marked for me to try out, it is going to take me a few more trips. And when I finally complete the list the post (or posts on Old Delhi food) is going to be one amazing read. You need to keep watching this space, so that you don't miss when it does appear. Now I knew the regular items (read chaat, kachori, kababs) that I will eat in the bylanes of Chandni Chowk, Nai Sarak etc., and some exotic food like Japani Samosas, Kullas that I will try out for the first time, what I wasn't expecting and came as a pleasant surprise was a vendor hawking Nankhatai's.

Now nankhatai's are Indian eggless cookies and the real easy ones at that. History points to Dutch colonizers of 16th Century with inventing the nankhatai and it was popularized by the Parsis who took over the bakeries started by the Dutch in Surat, Gujarat. Over time the nankhatai found their way to the streets in Delhi and from there to many a heart (and stomach). One early morning trip to eat the Nihari and I came across one of the hawkers preparing the nankhatai's on their very carts. Since it does not call for many ingredients, the hawker very easily makes the dough and cuts them into circles. He adds them to a round tray (which from far makes it look like a idli tray) and sets the tray in his oven made with hot coals. He covers the oven with his heavy skillet and waits for the nankhatai's to cook (or rather bake).

Going for Rs. 2.50 they are a steal and melt in your mouth. An ideal sweet after a heavy meal, when you crave for something sweet but not too heavy.
As I ate my nankhatai, I remembered my days in BTK (that is Basic Training Kitchen) in 1st Year Hotel Management, making my first batch of nankhatai's. It was almost 20 years and I had to get down making these lovely cookies. Though, I instinctively should have either reached for my 1st year recipe book (I have it somewhere in my pile of books) or gone the way the roadside hawkers do ( they use gramflour, flour, semolina, khoya, cardamom powder, sugar, soda bi-carb, baking powder and desi ghee), I decided to experiment a little. Since it is mandatory for all cookies to have chocolate in our house (my younger one insists), and my better half had tried the regular version a day earlier, I made Chocolate nankhatai's. I made them a little bigger (more appealing to a kid ...have one and don't come back for the second) and also used a little cinnamon (just a wee bit). The regular recipe and regular sized nankhatai will have to wait for another day ..and another post.

Chocolate Nankhatai
(Makes 16 cookies)


Ingredients
Flour - 155 gm
Ghee (Clarified Butter) - 130 gm
Sugar, powdered - 150 gm
Cocoa Powder - 5 gm
Semolina - 5 gm
Soda Bi-Carb - 1 Tsp.
Cinnamon - 1 Tsp


Method:
1. Cream the sugar and ghee until well blended.
2. Sift the flour with the Semolina, Cocoa Powder, Soda Bi-Carb and Cinnamon.
3. Add this dry mixture to the creamed ghee mixture.
4. Knead into a dough.
5. Divide into 16 balls.
6. Flatten each ball a little and place on a cookie sheet. Keep some distance between the cookies.
7. Bake the nankhatai's at 180 for 35 minutes.
8. Switch off the oven and let them cool in the oven for an hour.
9. Store in an airtight container.

Tuesday, September 13, 2011

Cocktail Samosas with a twist

Best Blogger Tips

I had a plan to visit Old Delhi this Saturday only to sample the food. The huge downpour on Thursday prompted me to postpone that trip by a week and not wanting to sit at home, I made a short trip to Central Market, Lajpat Nagar. After stuffing myself with chaat, samosas, bread pakoras and a lot more, I decided to do some of my own on Sunday. It was going to be samosas, but with a different filling.
Samosas are a very popular snack in India. I, for one have loved samosas since my childhood and some of my close friends know of this craving. It was fairly routine in my grandfather's house to have samosas and pakoras for evening tea every other day. I can't wait for winters to arrive so that me and my co-workers can walk across the office on foggy Delhi mornings to the local kiosk (more of a make shift shed) where the streetside vendor is busy frying fresh samosas and bread pakoras. You can find a crowd of people from various offices who have made this morning walk to bond over samosas, hot chai (tea) and discuss cricket (if not the office).
Simply put, Samosas are deep fried/baked stuffed pastry, mostly triangular in size, but other variations in shape do exist.
It's origins are widely debated and it is known by various names in various regions of India, Asia and Africa where it is widely eaten. Though some say say that it originated in Central Asia and was introduced to India in the 13th & 14th century by traders from Central Asia, renowned culinary historian K. T. Achaya differs (or maybe I misconstrued what he meant) while writing about Samosa in his 'A Historical Dictionary of Indian Food'. He quotes Amir Khusrao (1300 AD) describing the foods of the Muslim Aristocracy in India consisting of the 'samosa', which is prepared from meat, ghee, etc.Also, Ibn Batuta (14th Century traveler and explorer in the court of the Tughlaq dynasty in Delhi) during the same century describes the samosa ( which he calls a samusak), as a snack cooked with minced meat cooked with dry fruits such as almonds, pistachios alongwith onions and spices etc.(Per him it was served before the third course, the Pulao). Also, quoted is the Ain-i Akbari, which lists the samosa as the qutab (and states that the people of Hind call it sanbusa). Based on these historical inputs Achaya believes that the samosas were something that these travelers did not bring from their parent lands but indigenous to India. Apart from the historical works quoted by Achaya, the samosa is also listed by an Iranian historian Abolfazl Beyhaqi(10th Century) in the works called Tarikh-E-Beyhaghi. Irrespective of where it originated, the samosa has remained a popular snack. In North India,it consists of a filling of mashed potatoes and peas. As you travel to Pakistan you can find the version with meat filling. The samosa is also known as the Singhara in West Bengal (Eastern State of India) and in Hyderabad, India you can find a square shaped version called the Lukhmi.
For Samosa addicts, here is a great site which you have to see (unless you are faking it). It is called the Samosa Connection and has the history, origins, types and avatars listed. They even have a mail ID for you to contact them and submit your comments and suggestions. Now that is cool.

Thyme Cocktail Samosas with Cottage Cheese
(16 Samosas)

Ingredients:
For the Samosas
Flour - 200 gm
Oil - 40 ml.  Replace with Ghee below
Ghee - 50 gm (I used Oil, but had a good suggestion from Sidharth Bakshi to replace oil with ghee. Helps to remove the blisters from the final product).
Salt - 1/2 tsp.
Thyme - 1 tsp.
Flour - To Dust
Oil - To Deep Fry
Water - 1 Cup ( You may not require more than 4-5 tblsp.)

For the Filling
Paneer (Cottage Cheese), grated - 200 gm
Corn Kernels, blanched - 200 gm
Olives, sliced or chopped - 7
Cheddar /Processed Cheese, cut into 0.5 cm cubes - 40 gms
Shallots, finely chopped - 1/2 Cup
Garlic, finely chopped - 6 cloves
Black Pepper, freshly ground - 1 Tsp.
Mixed Herbs - 1 Tsp
Salt - To Taste
Olive Oil - 1 Tblsp

Method:
Dough for the Samosas:
1. Sift the flour and salt together. Add in the thyme.
2. Make a well in the centre and pour oil into it.
3. Start mixing the flour mixture with the oil gradually.
4. Once the oil is fully mixed, add in the water and knead to form a semi-hard dough.
5. Cover with a moist cloth and rest for a minimum of 15 minutes.

The Filling:
1. Heat oil in a heavy bottom pan.
2. Add in the chopped shallots. Cook them till they turn translucent. Add in the chopped garlic and cook for a couple of minutes.
3. Add in the paneer, mix well and cook for 3 minutes.
4. Add in the corn kernels. Mix well and cook for 3 more minutes.
5. Add in the herbs, seasoning and olives. Mix well and cook for an additional minute.
6. Switch off the flame and add in the cheese cubes and stir the mixture.

Making the Samosa:
1. Divide the dough into 8 equal portions and make a ball.
2. Divide the mixture into 16 equal portions. (each ball of dough will yield 2 samosas, hence twice the filling to the balls).
3. Place a ball on a lightly floured surface. Keep a bowl of water nearby (You will use it later).
4. Flatten it with a rolling pin and roll it into a round shape (3" in diameter).
5. Cut the circle into half.
6. Take one half of the circle (semi-circle) and place it in your palm. Position the straight edge to align along the forefinger.
7. Dip the forefinger of your other hand in water and use the wet forefinger to line the straight edge.
8. Fold the semi circle into a cone.
9. Stuff the filling into the cone (Do not fill to the brim - leave a portion vacant on top).
10. Line the edges of the open side with a wet forefinger.
11. Seal the open portion together by pressing firmly.
12. Arrange on a lightly floured tray.
13. Repeat the procedure till all samosas are prepared.
14. Heat oil in a wok.
15. Deep fry the samosas on medium heat till they are golden brown.
16. Drain the excess oil on absorbent paper.
17. Serve hot with chutney.

Note: Traditionally Samosas are served with mint chutney. Since these were different in their filling, I made an orange chutney to accompany the samosas.

Monday, September 5, 2011

Butter Chicken Quesadillas

Best Blogger Tips
Quesadillas is a dish which is mexican in origin and derives its name from the spanish word for cheese (Queso). Don't let the name fool you, its a simple corn or flour tortilla filled with cheese and other ingredients, which are generally savory in nature and then folded in half (into a half moon shape). This filled mixture is then toasted or fried until the cheese melts. It is then cut into wedges or slices and served.
Quesadillas have undergone a lot of changes throughout history and numerous variations exist not only in different parts of the world, but even in different parts of Mexico.

Purists differentiate between a quesadilla froma taco or burrito by stating that in a quesadilla, the ingredients are filled and then it is cooked, whereas for the taco or burrito the ingredients are cooked before and then added.

I just added my own twist to the variations by bringing in an Indian angle to the quesadilla, and though, my ingredients for the filling were cooked before, I still prefer to call it a Quesadilla. It is a little more time consuming to make, however, it is a very good recipe if you are out to impress and the look and compliments make up for the time spent preparing this. For starters, I have used Chilla (Indian chickpea flour pancake), instead of the flour or corn tortilla. Since you do not get Chillas in the marketplace of the shelves (as you would in the case of tortillas), this will require preparation. Also, you need to ensure the chillas prepared are thin, else they will break once filled and folded. The filling being used is the traditional butter chicken with a thick gravy and Monterrey Jack cheese. Butter Chicken requires grilling chicken first and then cooking in a tomato based gravy.

This requires both time and rolling up your sleeves, but then this is a show stealer and a damn good one at that.


Butter Chicken Quesadillas

4 Portions ( 9 wedges)

Ingredients:

Chillas - 3 No.s (Check recipe here. make the chillas thin)

Butter Chicken - 250 gms

Cheese, grated - 2 Cups

Oil - 4 Tblsp

Method:

1. Prepare Butter Chicken as given here. The only variations to the preparation are as follows:

- After grilling the chicken pieces, cut them into small 2 cm pieces.

- Simmer sauce before addition of cream and kasoori methi, till sauce almost coats the chicken pieces. Reduce cream to quarter.

2. Take each chilla and lay it flat on the working surface.

3. Spread the thick butter chicken mixture on one semi circular side of the chilla.

4. Sprinkle grated cheese on that side on top of the butter chicken mixture.

5. Fold the other plain side to cover the fully and form a folded semi circle. Press lightly.

6. Heat a flat plate/tawa and add 2 teaspoons of oil.

7. Add the semi folded chilla with the stuffing and cook lightly. Flip it over to cook the other side.

8. The cheese will melt and bind the 2 halves of the chilla.

9. Take off the hot plate/tawa and cut into 3 wedges (or 2 as you desire).

10. Repeat with remaining chillas.

11. Serve hot with your choice of dip or sauce.

 
Design by Free WordPress Themes | Bloggerized by Lasantha - Premium Blogger Themes | Laundry Detergent Coupons