Monday, May 31, 2010

Sorbets

Best Blogger Tips
The heat wave doesn't seem like ending this year. One thing that does take a huge beating during extremely hot summer months is the appetite. One thing that I do turn to, during summers is some nice homemade kulfi (milk based ice cream). This year however, I decided to try making some Sorbets.
Sorbets are frozen ice desserts. The name is derived from the Persian word "Sharbat" meaning fruit drink. Sorbets are not be mistaken for ice creams and ice lollies. Ice creams use dairy products which are not there in Sorbets. Ice lollies are just a combination of water and fruit flavoring. Sorbets generally have alcohol or liqueurs added to them. granitas are somewhat identical to Sorbets but differ in the fact that they have ice crystals which make them much crunchier. These ice crystals are not present in Sorbets.
In classical french cuisine (which has 16 courses), Sorbets were a separate course and were served generally to cleanse the palate. Of late they seem to have made a comeback of sorts, with many a restaurants serving Sorbets.
I have listed down three different sorbets, that I have experimented with of late. The aam panna sorbet seems to be a preferred one of mine.


Sapota Sorbet (Chikoo Sorbet)

Ingredients:

Chikoo's (Sapota) - 100 gm
Sugar - 150 gm
Lemon Juice - 50 ml
Cold Water - 30 ml
White Wine - 30 ml
Glucose - 20 gm

Method:
1. Deseed & Puree the Sapotas in a processor. Pass the puree through a soup strainer.
2. Combine all the ingredients alongwith this Sapota puree in a large bowl.
3. Whisk till all sugar dissolves.
4. If you have an ice-cream machine, churn this mixture and freeze for 10 minutes.
5. If you do not have an ice-cream machine, set in a shallow pan and place in a freezer.
6. Remove from freezer and churn again in a food processor.
7. Freeze till set.
8. To serve, scoop the sorbet and garnish with either a mint leaf or a slice of sapota on the side.


Aam Panna Sorbet

Ingredients:

Green Mangoes - 3
Sugar - 4 Tblsp
Black Salt - 1/2 Tsp
Cumin, roasted and powdered - 1/2 Tsp
Red Chili powder - A pinch
Mint leaves, chopped - 1 Tblsp
Water - 1 Cup
Glucose - 2 Tblsp
White Wine - 1 Cup

Method:
1. Place the mangoes in a pan with enough water to cover them. Bring them to a boil and simmer for 10 more minutes. Drain the water.
2. Stone and pulp the mangoes. Add this pulp to a food processor and churn till puree is fine.
3. Add all other ingredients to this pulp and whisk well to mix.
4. Set in a shallow pan till firm.
5. Take the set aam panna and churn again in a food processor.
6. Set in a bowl till firm.
7. To serve, scoop out the sorbet and garnish with a mint leaf.

Mango Sorbet

Ingredients:
Mangoes - 250 gm
Sugar - 50 gm
Lemon Juice - 30 ml
Glucose - 20 gm
Cold Water - 30 ml
White Wine - 30 ml

Method:
1. Stone & Pulp the mangoes. Puree in a food processor. Strain the puree through a strainer.
2. Add all other ingredients to this puree and whisk well to dissolve sugar.
3. Set in a shallow pan and place in a freezer.
6. Remove from freezer and churn again in a food processor.
7. Freeze till set.
8. Scoop the sorbet to serve.

Friday, May 28, 2010

Bharwaan Lauki aur Mattar Ki Tarri (Stuffed bottle gourd in peas gravy)

Best Blogger Tips

I ran away from Delhi to escape the heat and went over to Palampur for the week. The heat wave did not spare me there either. It was much much cooler than Delhi and Punjab, but I think they will require some air conditioning too. It was a fulfilling time away from work and good time spent with the family. Over the last few days, we visited a lot of good scenic places and also found time to visit some important religous sites, not to forget the Baijnath temple, which is a Jyotirlinga. Dharamshala and McLeodganj were a disappointment as they were too commercialized.

Coming to this post, I must admit, when I started out with this, I wasn't too sure how it will turn out. Now that it passed the taste test of my better half, and a repeat involving my extended family of aunts and cousins, it is not only a safe bet but also a must try for all those wondering what to cook for the next social evening, unless you don't mind serving the makhani and kadhai stuff.
Stuffed Lauki (bottle gourd) is not a rarity, but a gravy of green peas is surely one. Be a little innovative and play with the stuffing.

Bharwaan Lauki aur Mattar Ki Tarri

Ingredients:

Bottle Gourd (Lauki) : 1 (450 gm)

For the Stuffing:

Onions, finely chopped : 1/4 Cup
Garlic, finely chopped: 3 cloves
Ginger, finely chopped : 2 Tsp
Cottage Cheese (Paneer), grated: 75 gm
Potatoes, mashed: 150 gm
Sweet corn: 50 gm
Cheese, grated: 4 Tblsp
Garam Masala: 1 Tsp
Red Chili Powder: 1 Tsp
Raisins: 1 Tblsp
Almonds, finely chopped: 1 Tblsp
Oil: 1 Tblsp
Salt: To Taste

For the Gravy:

Green Peas: 2 Cups
Onions, finely chopped: 1 Cup
Ginger-Garlic Paste - 4 Tsp
Coriander Powder - 2 Tsp
Poppy Seed Paste (Khus Khus paste): 2 Tsp
Green Chili Paste - 1 Tsp
White Pepper Powder: 2 Tsp
Cinnamon: 1"
Kasoori Methi: 2 Tsp
Salt: To Taste
Oil: 4 Tsp
Cream: 2 Tblsp

For Garnish:

Amchur Powder (Dried Mango Powder) : 1 Tsp


Method:

To Prepare the Bottle Gourd:

1. Wash, Peel & cut the ends of the Bottle gourd(lauki).
2. Boil hot water with a tsp of salt, and add the bottle gourd as the water starts to boil. Cook for 2-3 minutes. Drain the water.
3. Scoop out the inside pulp of the bottle gourd. Do not discard.
4. Mash the scooped pulp and mix well with mashed potatoes.
5. Heat oil in a pan. Add in the chopped onions.
6. As the onions turn translucent, add in the ginger and garlic. Cook for two minutes.
7. Add in the lauki and potato mixture. Cook for 7 minutes.
8. Add in the paneer and all the spices. Cook till all moisture is gone.
9. Add in the raisins and almonds. Cook for a minute and take off flame.
10. Mix in the grated cheese.
11. Stuff this mixture in the hollowed out lauki (Bottle gourd).
12. Bake the stuffed bottle gourd for 30 minutes at 180 degrees Celsius or till cooked.

To Prepare the Gravy:

13. Heat oil in a pan. Add Cinnamon and as it starts to crackle, add in the onions.
14. Cook till onions turn light golden. Add in the ginger-garlic pastes.
15. Stir fry till mixture turns golden.
16. Add corainder powder (dissolved in 1 Tblsp of water to prevent it from burning). Cook for a minute.
17. Add in the poppy seed paste, green chili paste and salt. Cook till fat starts to leave the sides.
18. Add the green peas, white pepper powder and a cup of water. Cook till peas are done. Add in the kasuri methi 2 minutes before switching off the flame. Stir well.
19. Remove from flame and cool. Puree in a blender.
20. Pass this puree through a soup strainer in a pan.
21. Put the pan back on flame. Reduce, add in the salt and cream. Cook till it almost comes to a boil.

To Arrange:

22. Cut the cooked bottle gourd into 1" thick slices.
23. Pour the gravy over the sliced bottle gourd pieces.
24. Sprinkle some amchur powder on top and Serve hot.

Wednesday, May 12, 2010

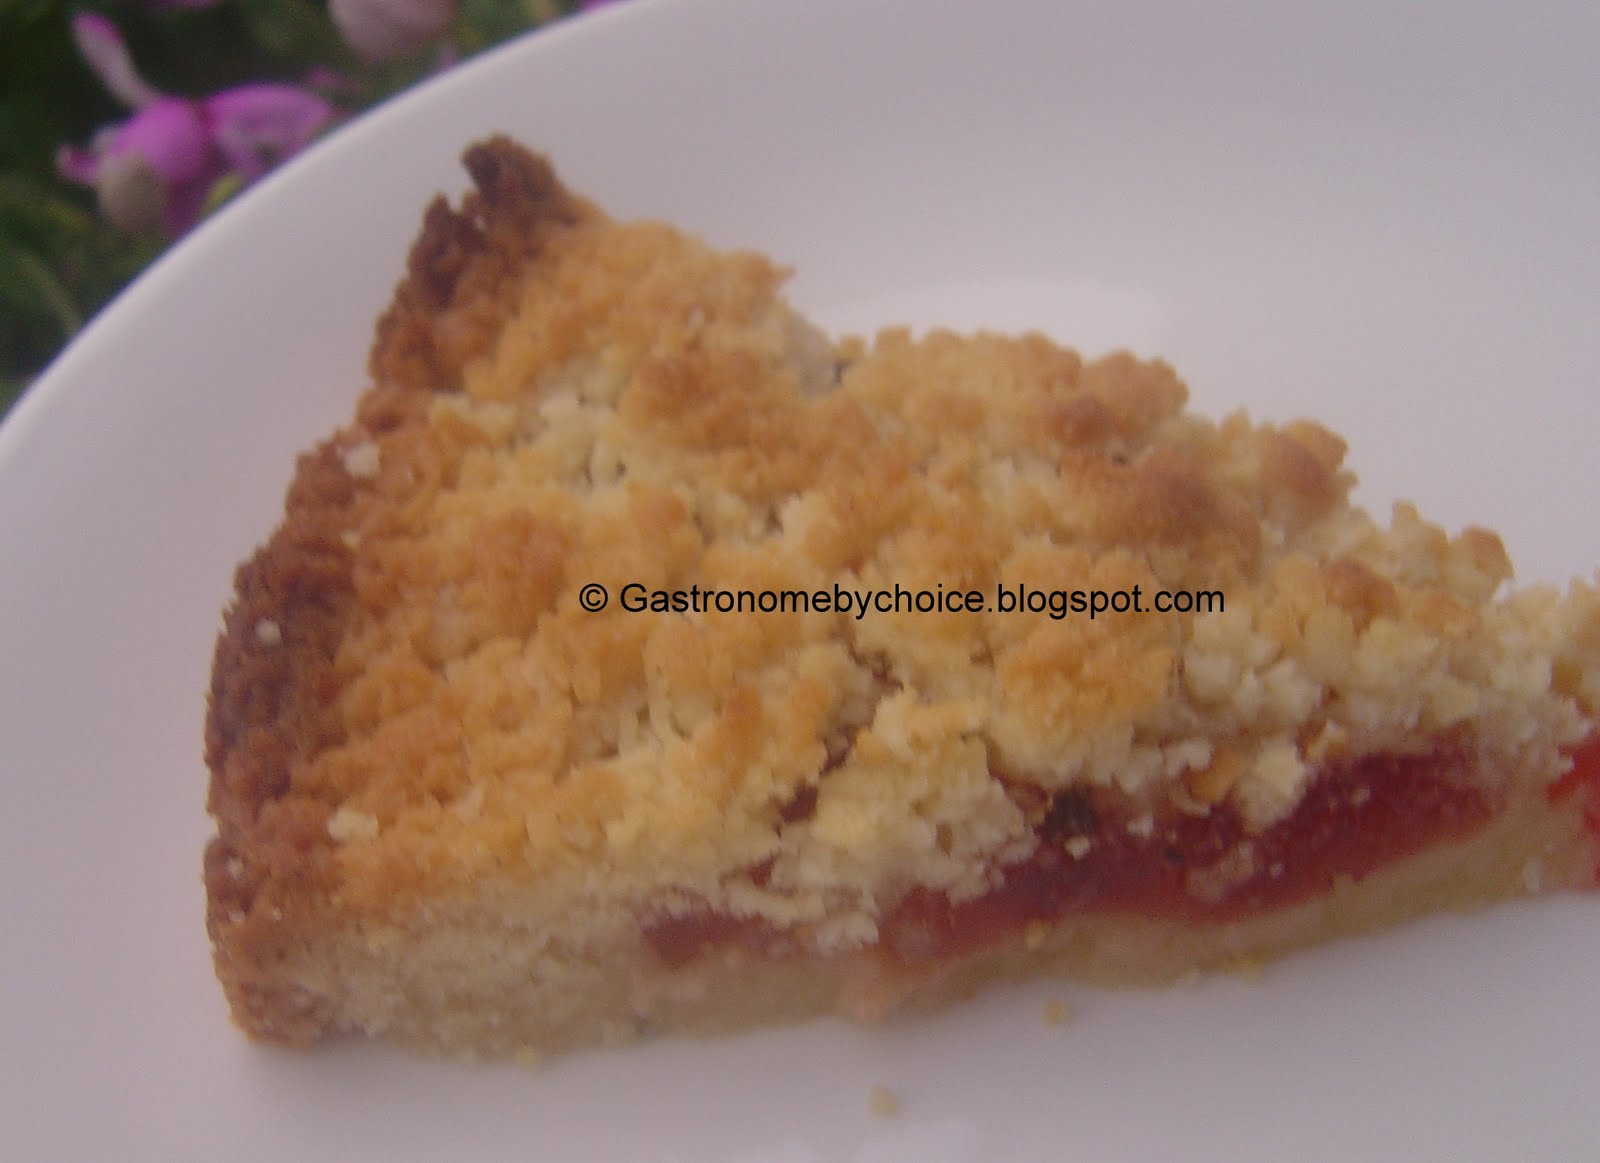
Hungarian Shortbread

Best Blogger Tips
I happened to come across this amazing recipe browsing through my collection of cookery magazines. The magazine had been with me for quite some time and I had read it so many times trying to look for something to cook or bake and surprisingly I always overlooked this simple recipe. What caught my eye wasn't its simplicity but the fact that the dough has to be frozen and then grated. This ends up making the shortbread extremely crumbly.

Hungarian Shortbread

Ingredients:

Refined Flour - 2 Cups
Baking Powder - 1 Tsp
Salt - A Pinch
Unsalted Butter - 1 Cup
Sugar - 1 Cup
Egg yolks - 2
Mixed fruit jam - 3/4 Cup

Method:
1. Sift together all the dry ingredients (except sugar) in one bowl and leave aside.
2. Cream butter using a hand blender. Add in the sugar gradually while continuing to beat.
3. Add in the egg yolks, one at a time and beat till mixture is light and fluffy.
4. Add in the dry ingredients mixture and fold till blended.
5. Transfer the dough to the kitchen counter and work with your hands to form a dough.
6. Divide the dough into 2 balls and cover with plastic wrap.
7. Freeze for 45 minutes to an hour.
8. Take the frozen dough out of the freezer.
9. Grate the first ball of frozen dough (using a cheese grater) directly into a lightly greased springform pan.
10. Even out the grated dough by gently patting it.
11. Spread the jam evenly on this grated dough, leaving a 1/2" border around the edges.
12. Now grate the second ball of frozen dough over the jam layer. Even it out by patting gently.
13. Bake in an oven, heated to 190 degrees celsius, for about 30 minutes or until golden brown.
14. Leave to cool in pan, before cutting it out into wedges and serving.

Saturday, May 8, 2010

Jewels from Avadh (Part 2) - Lucknowi Dum Pukht Biryani

Best Blogger Tips
When it comes to Biryani lovers, there are two distinct groups that one comes across, the Hyderabadi biryani and the Lucknowi biryani fans. Somewhere in between there are atleast 20-24 different types of biryani's, with their own fan following, but these 2 types rule the palate with the majority in the sub-continent.
The Lucknowi Biryani can be simply defined as a homogeneous blend of different textures, spices and aromas. The Lucknowi biryani is cooked in stock and not water. The Dum Pukht Biryani is the most popular version of the Lucknowi biryani and this is also the biryani that I prefer. For the best Lucknowi Biryani in the capital, you need to eat at the Dum Pukht restaurant at ITC Maurya Sheraton at Dhaula Kuan.
I had this request from JH (quite a long time back) to post the recipe for Lucknowi Biryani and since I was used to having the authentic one at restaurants, I didn't even realize that I had never ever made this one myself. As I got about asking for the recipe from some of the chefs I was still in touch with from my past life as a hotelier, somewhere deep within I felt if I will ever be able to do justice to the delicate balancing of the aromas. After weeks of procrastination, I finally got down to making this one, with my wife and 2 sons as the judges of whether I had passed the test. The result I must say wasn't that bad. It certainly was no match to what the Quereshi family makes, but my creation was a hit atleast in my family. Moreover, I couldn't resist going for seconds and third helpings till it got over.

Other Biryani's on this site :

Hyderabadi Biryani
Khoja Kachi Biryani
Bohri Biryani


Lucknowi Dum Pukht Biryani


Ingredients:
Chicken, cut into small pieces - 500 gm
Rice (Basmati) - 2 Cups
Ghee - 5 Tblsp
Chicken Stock - 4 Cups
Onions, finely chopped - 1 Cup
Black Cardamom - 4
Green Cardamom - 3
Black peppercorn - 10
Cinnamon - 2"
Cloves - 8
Fennel seeds - 1 Tsp
Bay Leaf - 2
Kewra Essence - 1/2 Tsp
Gulab ittar - 1/4 Tsp
Milk - 1/4 Cup
Saffron - 4-5 strands
Salt - 1 Tsp

For Marination:
Onion, finely chopped - 1/2 Cup
Ginger, finely chopped - 2 Tblsp
Garlic, finely chopped - 2 Tblsp
Coriander Powder - 1/2 Tsp
Cumin Powder - 1/2 Tsp
Red Chili Powder - 1 Tsp
Cinnamon Powder - 1/4 Tsp
Cloves, ground - 1/4 Tsp
Nutmeg powder - 1/4 Tsp
Lime juice - 1/4 Tsp
Yogurt - 1/2 Cup
Salt - 1/4 Tsp

For Garnish:
Onion, thinly sliced and fried in ghee till they are browned - 1 Cup
Almonds, sliced and fried - 1/4 Cup
Cashews, sliced and fried - 1/4 Cup

Method:
1. Boil the stock with the whole spices - Black cardamom, black peppercorn, cinnamon, cloves, fennel seeds and bay leaf. Let it rest for 20 minutes and then strain.
2. Wash 7 rinse the basmati rice twice in cold water. Soak the basmati rice in water for 30 minutes - 1 hr. Drain.
3. Meanwhile, mix all ingredients for marinade in a processor and make a smooth paste. Add in the chicken pieces and mix well to coat each chicken piece. Let it marinate for upto 5 hours.
4. Heat ghee in a large pan. Add in the rice. Cook for 5-7 minutes or till rice turns opaque white.
5. Crush & add in 2 saffron strands. Add in 4 cups of chicken stock.
6. Bring the rice to a boil, cover and allow to simmer for 15 minutes. Switch off the flame and let the rice rest for 10-15 minutes. This will allow the rice to absorb the moisture.
7. Take another heavy bottomed pan and add ghee. Heat. Add in the chopped onions. Saute till onions turn translucent. Add in the marinated chicken and saute till chicken is done and the gravy has almost dried up.
8. Take an earthernware pot (preferably) which has a lid, to start assembling the biryani. Add in ghee and grease the earthenware pot.
9. Lay a layer of rice. Sprinkle some chicken stock. Add in some of the chicken pieces. Repeat this alternate layering of rice and chicken pieces. Finish with a layer of rice on top. Sprinkle the rest of the chicken stock.
10. Warm the milk with cardamom pods. Crush and add the saffron. Add the Kewra and Gulab ittar.
11. Sprinkle on top of the finished biryani layers.
12. Add in the garnishes.
13. Now cover with a lid and seal the vessel by applying a dough made with wheat flour or flour around the lid, all the way around.
14. Preheat an oven to 200 degrees Celsius. Place the biryani in the oven. Let the biryani cook in the oven for 10-15 minutes.
15. Remove, break seal and serve straight from the pot.

Note: Traditionally Lucknowi biryani is served with boondi raita or Burrani raita (raita made by whisking thick yogurt with garlic juice, powdered onion seeds, shahi zeera and black salt) and papads alongwith traditional pickles.
Firni or Kheer goes very well as a dessert course after the lucknowi biryani.

Tuesday, April 6, 2010

Murg Handi Lazeez

Best Blogger Tips
I have been fairly lazy all these weeks. Guess it's the heat wave that is generating the laziness and over the last few weeks, I find myself with so many recipes to post that if I do not start rolling up my sleeves and typing, I'll be left with enough to post for the whole year.
The handi is an integral part of the Indian kitchen. Traditionally the handi is a thick bottomed vessel with a neck that is narrower than the base. It also traditionally has a lid to cover it and retain the aroma. The handi has been used to prepare many dishes with a predominantly thick gravy. The most popular gastronomical export of the Handi cooking is the dum style of cooking. The other well known aspect of the handi cooking is the Bhunao method which is used in many households predominantly in the northern parts of the country.
Murg handi lazeez or chicken cubes cooked in a cardamom scented creamy yogurt and garlic brown gravy is a typical dish highlighting the use of the Handi and this vessel lends its name to the dish.

Murg Handi Lazeez

Ingredients

Chicken, cut into pieces : 500 gm
Yogurt, whisked : 1 Cup
Chicken Stock: 1 Cup
Onion, roughly chopped : 2
Garlic cloves, roughly chopped - 6 cloves
Green chili paste - 2 Tblsp
Coriander Powder: 2 Tsp
White Pepper Powder : 1 Tsp
Cinnamon: 1" stick
Cloves:4
Cardamom: 2
Bay Leaf :2
Mace powder: 1 tsp
Ginger Garlic paste : 4 Tblsp
Lemon Juice : 1 Tblsp
Salt : To Taste
Ittar : 2-3 drops

Method:

1. Fry the chopped onion and garlic in oil till they turn golden brown. Grind this fried onion and garlic to a paste.

2. Heat ghee in a Handi, add coriander powder and stir fry for 30 seconds.

3. Add bay leaves, other whole spices and ginger garlic paste and fry for 2 minutes.

4. Add chicken pieces and yogurt. Stir fry for 2-3 minutes and add salt.

5. Cover with a lid and cook until all moisture evaporates and chicken becomes tender.

6. Open the lid, add fried onion garlic paste, green chili paste, white pepper powder, and mace/cardamom powder.

7. Pour 1/4 cup water, chicken stock and lemon juice. Cover with lid and cook on slow flame for 6-7 minutes.Add the ittar 2 minutes before finishing and remove off flame.

8. Serve hot garnished with chopped coriander leaves.

Saturday, April 3, 2010

Aam Panna

Best Blogger Tips
If the temperatures we saw in March were anything to go by, it's going to be a long hot summer. I'm already dreading May and making all plans to avoid it.
All kind of thirst quenchers are already out and keeping me company as I try to keep the heat away.
Indian kitchen has its own recipes of traditional drinks and the aam panna remains a household favorite. Made by using green mangoes the panna is a great solution for heat exhaustion. The green mangoes are a rich source of pectin, citric and other acids apart from being a great source of Vitamin B1, B2 and C, which prevent loss of sodium chloride and other essential body fluids. It has also been found to be great in treatment of gastro-intestinal disorders. So go ahead make yourself some aam panna and raise a toast to keeping the heat wave away.

Aam Panna

Ingredients:

Green Mangoes - 7
Sugar - 4 Tblsp
Black Salt - 1 Tsp
Cumin, roasted and powdered - 1.5 Tsp
Red Chili Powder - 1/2 Tsp
Mint Leaves, chopped - 3 Tblsp
Water - 5 Cups

Method:
1. Place the mangoes in a pan of water (enough to cover them) and put on a flame.
2. Cook to bring them to a boil. Simmer for 10 more minutes and then remove and drain water.
3. Stone and pulp the mangoes.
4. Add the remaining ingredients to the pulp and whisk well to mix.
5. Adjust seasoning and transfer to a jug.
6. Serve chilled with ice.

Monday, March 29, 2010

Eggplant Parmesan (Melanzane alla Parmigiana)

Best Blogger Tips
Fried eggplant slices coated with tomato sauce, layered with cheese and baked in oven. This is the simplest description of this exotic sounding dish. Yet this simple sounding dish can be such a challenge to make. The thickness of the slice, with skin or without skin, the kind of batter to use, to coat with breadcrumbs or not, the tomato sauce and the type of cheese can all play a very important role in not only how it comes out but how it tastes also.
Eggplant parmesan is a southern Italian dish and there are many versions to the origin of the name. Though many believe that the origin of the dish is due to the use of Parmigiano-Reggiano cheese, there are still a handful that believe that the name Parmigiana is a corruption of the word Parmiciana, a word from the Sicilian dialect, which refers to slats of wood in a shutter. The dish is so named after the slats, because the eggplant slices overlap each other just like the wooden slats in a shutter.
Irrespective of the controversy, it is a very popular dish the world over with different variations of the same existing, some even involving chicken and veal.
The variation I try does not use breadcrumbs. Breadcrumbs made the dish very heavy and I prefer to use a lighter tempura like batter instead.

Eggplant Parmesan

Ingredients:
Eggplant, big, cut into thin slices- 1
Mozzarella, sliced - 5-6 slices
Parmesan, grated - 1/2 Cup
Salt
Oil - For deep frying

For the batter:
Egg -1
Flour - 1 Cup
Milk - 1/4 Cup
Water - 3/4 Cup
Baking Soda - a Pinch

For tomato sauce:
Olive Oil
Tomatoes, concassed - 1 Kg
Garlic cloves, finely chopped
Onion, finely chopped - 1
Basil - 1 tsp
Black pepper, freshly ground - 2 Tsp
Salt - To Taste

Method:
1. Sprinkle salt on the eggplant slices and let them rest covered, so that they lose moisture and the bitterness. Leave aside.

2. To Make Tomato Sauce: Heat olive oil in a wok. Add in the onions and saute till they start to turn golden.
3. Add in the garlic and saute for another 2 minutes.
4. Add the concassed tomatoes and 1 cup of water.
5. Cook till the sauce starts to turn thick.
6. Add the salt, black pepper powder and basil.
7. Cook for another minute. Take it off flame.

8. To Make Batter: Combine all ingredients for batter.
9. Whisk well till a thick batter forms.
10. Chill for 10-15 minutes.

11. Heat oil in a big wok.
12. Dip the eggplant slices in the batter and deep fry till done.
13. Remove and drain excess oil. Keep aside.
14. Take a baking dish and lightly oil it .
15. Spread a layer of the tomato sauce. Now dip each batter fried eggplant slice in the tomato sauce and add to the baking dish. Make a layer of eggplant slices.
16. Layer with some more tomato sauce and sprinkle the parmesan cheese.
17. Repeat this 3 more times.
18. Add the remaining tomato sauce on top and layer the mozzarella cheese.
19. Bake at 200 degrees for 30 minutes.
20. Cut into slices and serve hot.

Saturday, March 27, 2010

Pollo alla Cacciatore

Best Blogger Tips
A few weeks back, I had a colleague of mine over from Europe. Since she belongs to Italy, we got into a discussion on Italian cuisine and wine in particular. I guess, it stayed with till over the weekend and come Sunday, I was busy trying to recreate some Italian dishes that have always been my favorites.
Pollo alla Cacciatore, was first made by me when I was in the culinary institute. The term comes from the Italian term, Pollo meaning chicken and cacciatore meaning hunter. In culinary terms alla cacciatore means prepared in the hunter style, using tomatoes, herbs, mushrooms, onions and yes! wine. The choice of wine can be tricky with red wine being used in Southern parts and white wine being preferred in the Northern parts of Italy. This is a very popular dish and like many popular dishes each region has its own variation to this dish. It even has a cousin in France which is called Poulet Saute Chasseur.

Pollo alla Cacciatore

Ingredients:
Chicken, cut into large pieces - 1 kg
Onion, finely chopped - 1
Garlic, crushed - 3 cloves
Bacon, preferably Pancetta, finely chopped - 150 gm
Mushrooms, thickly sliced - 125 gm
Red Wine - 1/3 Cup
Tomatoes, chopped - 800 gm
Brown Sugar - 1/4 tsp
Cayenne Pepper - 1/4 tsp
Oregano - 1 tsp
Thyme - 1 tsp
Bay Leaf - 1
Black Pepper - 2 tsp
Salt - To Taste
Olive Oil - 6 tblsp

Method:
1. Heat 3 tblsp oil in a large pan. Add the onion and garlic. Cook till onion turns golden brown. Add the bacon followed by the mushrooms. Cook for 5 more minutes. Transfer to another bowl.
2. Add the remaining 3 tblsp olive oil to the same pan and heat. Add the chicken pieces.
3. Cook till chicken starts to brown. Add the salt and black pepper powder.
4. Add the red wine and cook till the wine has almost evaporated.
5. Add the chopped tomatoes, cayenne pepper, brown sugar, thyme, oregano and bay leaf.
6. Add in 1/3 cup water and mix well. Cook till the mixture comes to a boil.
7. Add in the mushroom mixture that we had cooked earlier. Mix well.
8. Lower the flame and cook for 20-25 minutes on low flame stirring from time to time or till chicken in done and excess liquid has evaporated.
9. Serve hot with steamed rice.
Next Time : Eggplant Parmesan

Thursday, March 18, 2010

Paneer Moghlai Kofta in Paalak Gravy (Cottage Cheese Koftas in Spinach Garvy)

Best Blogger Tips
It has been a while since I cooked a real piece de resistance for the vegetarians and this one is one such beauty that has come about in quite some time. If there is one thing that catches my fancy in kitchens it has to be the Koftas. In the hands of experts, Koftas are transported to the highest levels of culinary display.
Koftas in traditional terms are minced balls made out of popularly lamb or beef. However, it is not uncommon to find Koftas of chicken mince and for the vegetarians, koftas made of paneer, bottle gourd, mashed potatoes etc. It is derived from the Persian word Kufta meaning "to beat" or "to grind", which in those days was meant to mince meat.
The name Kofta has many variations in different parts of the world. They go by the name of Kufteh in Iran, Cufta in Croatia, Kyufte in Bulgaria, Keftes in Greek cuisine and chiftea in Romania.

Paneer Moghlai Kofta in Paalak Gravy

Ingredients:


Kofta:

Paneer (Cottage Cheese or Ricotta), grated : 300 gm
Apricots, dried : 12
Almonds, Blanched : 12
Red Chili Powder : 1 Tsp
Amchoor (Dried Mango Powder) : 1/2 Tsp
Baking Powder : A Pinch
Salt
Garam Masala Powder : 1/2 Tsp
Cornflour : 1/2 Cup
Oil : To Deep Fry Koftas

Gravy:
Spinach, washed and rinsed in running water : 1 Kg
Onions, finely chopped : 2
Garlic Paste : 3 Tblsp
Tomato Puree : 6 Tblsp
Red Chili Powder: 1 Tsp
Black Pepper Powder : 1 Tsp
Coriander Powder : 1 Tblsp
Kasoori Methi (Dried fenugreek leaves): 1 Tblsp
Ghee ( Clarified Butter) : 2 Tblsp
Salt: To Taste

Method:

Koftas:

1. Refresh the apricots in water for 5 minutes.
2. Slit from one side and remove the pits. Replace the pits with the blanched almonds. Keep aside.
3. Mix all other ingredients (except oil and stuffed apricots) for koftas. Knead well to form a dough.
4. Divide into 12 equal portions and make balls.
5. Flatten each ball using your palms, being careful not to break it.
6. Place a stuffed apricot in between and make a ball again.
Make 12 such balls.


7. Chill for 10-15 minutes.
8. Heat oil in a wok.
9. Deep fry the balls till golden brown. Drain excess oil and keep aside.

Gravy:
1. Boil spinach in water with salt. Drain and puree in a blender.
2. Heat ghee in a pan.
3. Add chopped onions and saute till they turn translucent.
4. Add in the garlic paste. Saute till the onions start to turn golden brown.
5. Add in the masalas and saute for 3-4 minutes.
6. Add the spinach puree and cook for 5 minutes.
7. Add in the tomato puree and a cup of water.
8. Cook till it starts to take a gravy like consistency.
9. Adjust the seasonings and simmer for 5 minutes.


Assembling:
1. Add in the koftas to the simmering gravy.
2. Crush the kasoori methi and sprinkle on top.
3. Stir and remove from flame.
4. Serve hot.

Tuesday, March 16, 2010

Orange banana bread

Best Blogger Tips
So how many times have you ordered bananas because your kids loved them and then watched as they started to rot. Sounds familiar. Happens at my home everytime. And then you make Banana bread to ensure they do not go wasted. The kids love it too, right. But not when it becomes a weekly or biweekly affair. Atleast not in my house. They are like some evolving species that ensures they test my skills and patience to try out something new in order to utilize the bananas. That is where the Orange banana bread comes in. An attempt to get something new in front of them. They love it, but I know I will have to start thinking for another variation to the banana bread in the coming few weeks. Till then, enjoy what you have.

Orange Banana Bread

Ingredients:


Bananas, mashed : 3 No.
All purpose flour : 2 Cups
Baking Soda: 3/4 Tsp
Butter : 1/4 Cup
Castor Sugar : 1/2 Cup
Light brown sugar : 1/2 Cup
Eggs : 2
Orange rind, grated : 1 Tblsp
Orange Juice : 3 Tblsp
Salt : 1/2 Tsp


Method:
1. Sift together flour, baking soda and salt in a bowl. Keep aside.
2. Cream together the butter and the sugar (both white and brown) until well blended.
3. Add in the eggs, one at a time, and continue to whisk.
4. Add in the mashed bananas, orange rind and juice. Blend well.
5. Add in the flour mixture. Mix until just moist.
6. Spoon the batter into a greased loaf pan.
7. Bake at 180 degrees celsius (350 Fahrenheit) for 50 minutes or until done.
8. Cool on a wire rack.

 
Design by Free WordPress Themes | Bloggerized by Lasantha - Premium Blogger Themes | Laundry Detergent Coupons